

Can I Use Brad Nails On Cornhole Boards
1 / fifteen
Purchase a Special Bract
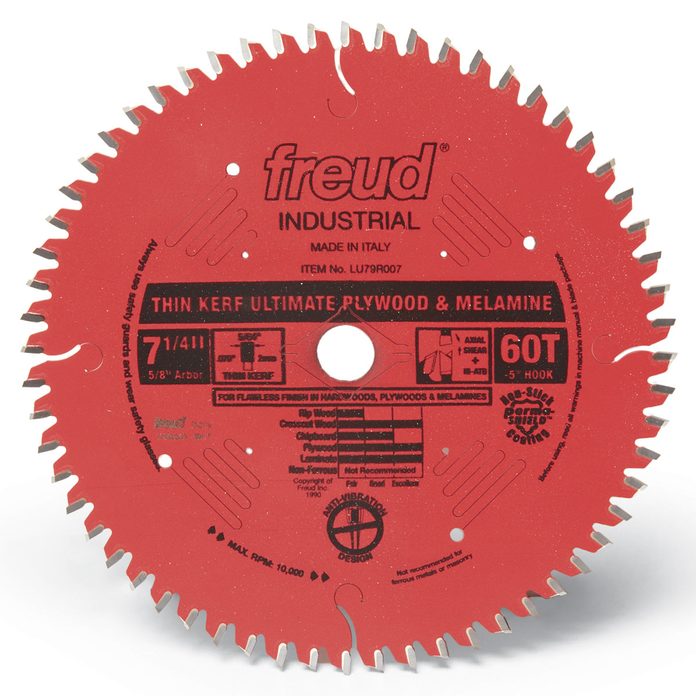
The melamine stop chips easily when cut, peculiarly if y'all're using an everyday saw blade. Simply y'all tin can largely avoid chipping by investing in a special blade that's designed to cut plastic materials. The teeth on these blades are less angled, which helps prevent chipping. I example is the Freud LU79R007 7-one/4-in. bract. If y'all can't justify spending this much, y'all can still get good results with a less expensive bract that has at least 40 carbide teeth. But be certain to use the chip-free cutting technique that nosotros show in Tip iv.
2 / 15
Order the Color You lot Desire
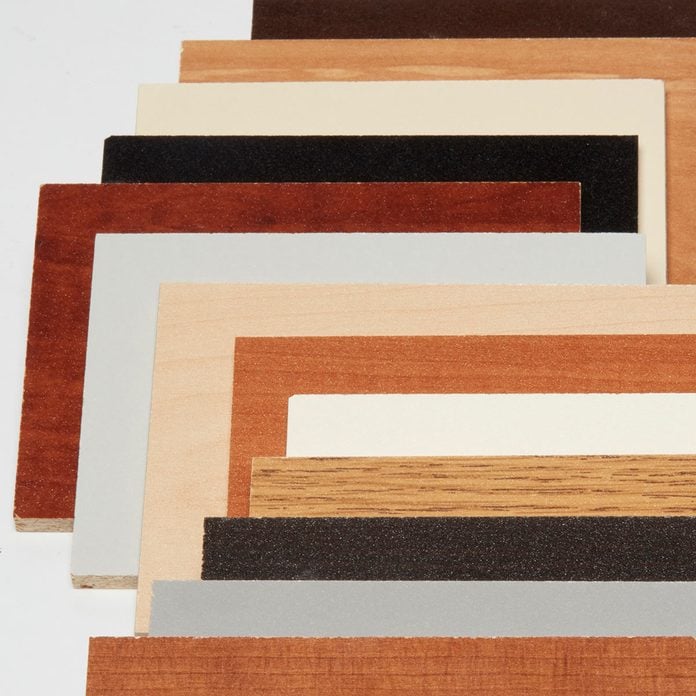
You'll typically notice melamine products in white at dwelling house centers, merely many colors are bachelor. Depending on the brand, yous'll find 10 to twenty or more colors available for special guild. Check with your local lumberyard or dwelling center for your options.
3 / 15
Wear Safety Gear
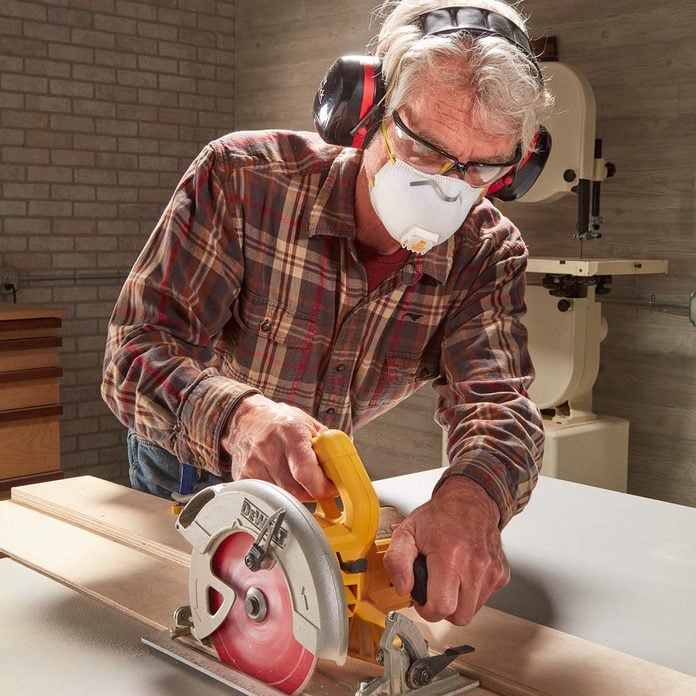
You should ever vesture condom gear when you're using power tools. There are detail safety concerns when you're working with melamine. For starters, the plastic finish tends to chip off as it's cut. The chips are as sharp as glass, creating a real take chances for your eyes. Condom glasses are a must.
The fine dust created by cutting the fiber core is bad for your lungs. If possible, cutting outdoors. Indoors or out, wear a grit mask. Clothing gloves when you lot're handling big sheets of melamine. The edges tin be razor sharp. And don't forget hearing protection.
four / 15
Cut Without Chipping
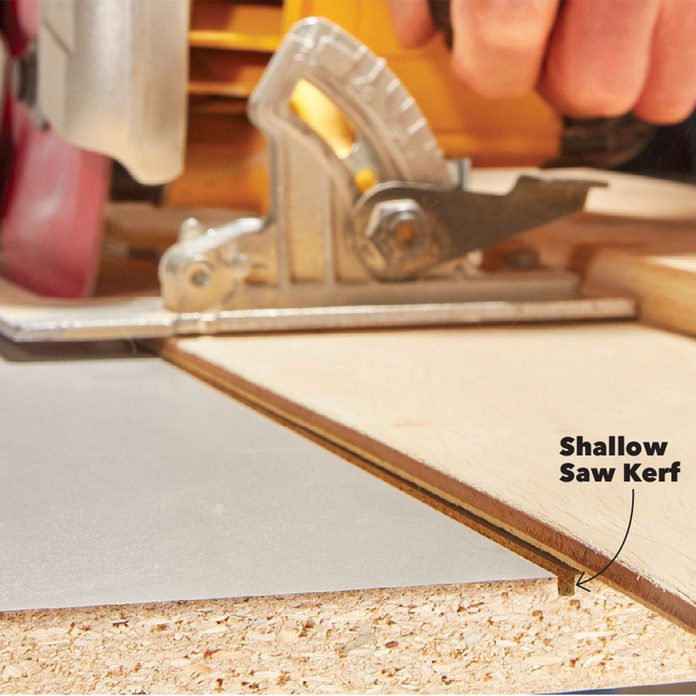
Making a scoring cutting before the concluding one will effect in a bit-gratuitous border. First, utilise a straightedge equally a saw guide. Without the straightedge, the saw might wobble slightly as you cut, and this twisting will contribute to chipping. Clamp your straightedge guide in position and set the saw to cut one/8 in. deep. Run your saw forth the straightedge and cut a groove in the melamine panel. This shallow cut shouldn't produce whatsoever chipping.
Now reset the saw then the bract extends about one/two in. by the bottom side of the panel and make another laissez passer. The resulting cut will exist perfectly chip-free on both sides. You can use the same technique on a table saw. Make i shallow cut. Then run the panel through the saw a second fourth dimension to complete the cut. If only 1 side of the panel volition be visible in the finished project, you don't need to use this technique considering chipping occurs simply on the side where the saw blade teeth exit. Just brand sure to place the "show" side down if you're cutting with a circular saw and up when you're using a tabular array saw.
five / 15

Pin Panels, So Add Screws
The melamine stop is slippery, making it hard to hold the panels in alignment while you drill pilot holes for the screws. Solve this problem by first pinning the panels together using an eighteen gauge brad nail gun. The minor holes left by the brads are nearly invisible, and you'll salve yourself a lot of time and frustration.
half-dozen / fifteen
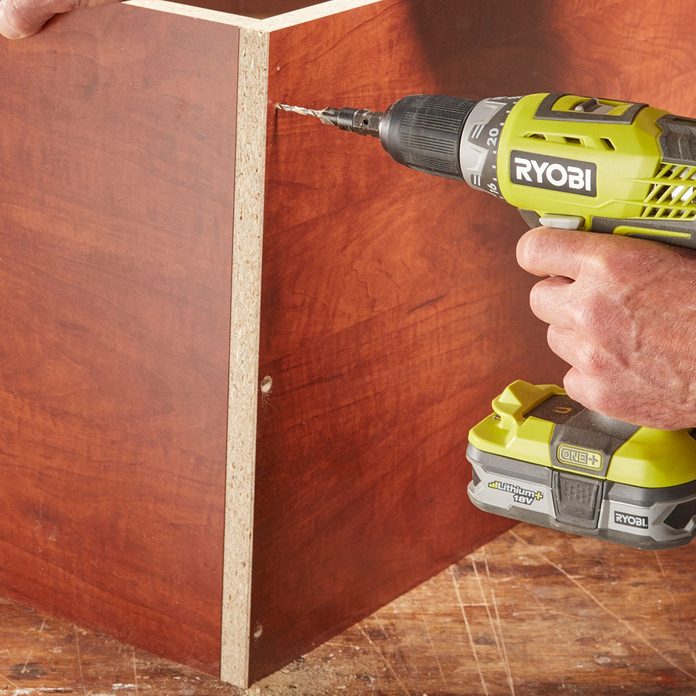
Drill and Countersink for Screws
Particleboard, whether information technology has a melamine finish or non, doesn't hold screws too as solid lumber or plywood. Plus, it tends to split if you drive screws without drilling showtime. The key to fastening it with screws is to drill pilot holes for the screws and countersinks for the screw heads.
vii / 15
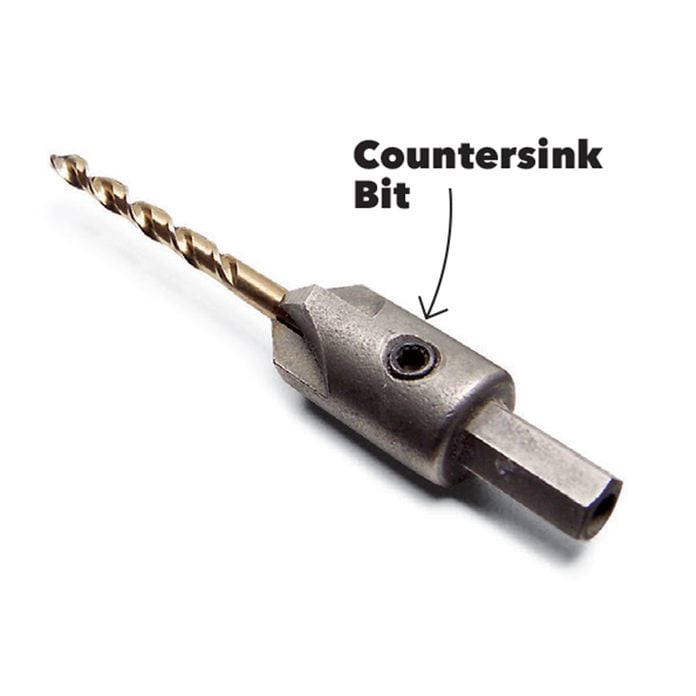
Dedicated Countersink Fleck
A combination bit that drills and countersinks in ane performance saves time. Choose a countersink chip that's labeled for use with No. eight screws.
8 / xv

Strengthen Shelves With Nosing
Melamine shelves will sag over fourth dimension, especially if they're more a few feet long. Strengthen shelves past gluing a solid wood nose to 1 or both edges of the shelf. Here we've slotted the nosing and the melamine shelves with a biscuit joiner to allow the use of woods biscuits. The biscuits add strength and help marshal the edging perfectly. No nails needed; just utilize wood glue, insert the biscuits and clench the edge to the shelf until the glue sets.
nine / 15
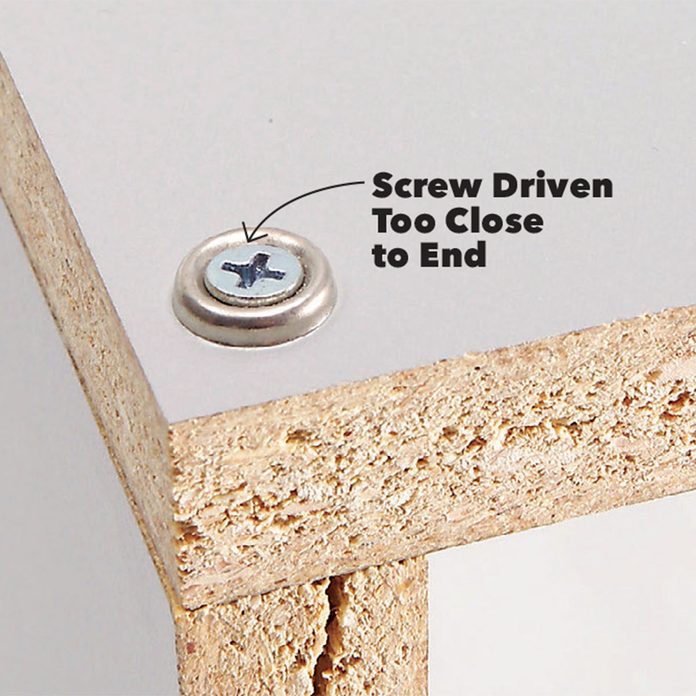
Prevent Splitting
The particleboard core is rather breakable and tin split if you bulldoze screws too close to the edge. Prevent this by positioning screws at to the lowest degree 2 in. from the border of panels when possible. Drilling a pilot hole also helps prevent splitting.
10 / fifteen
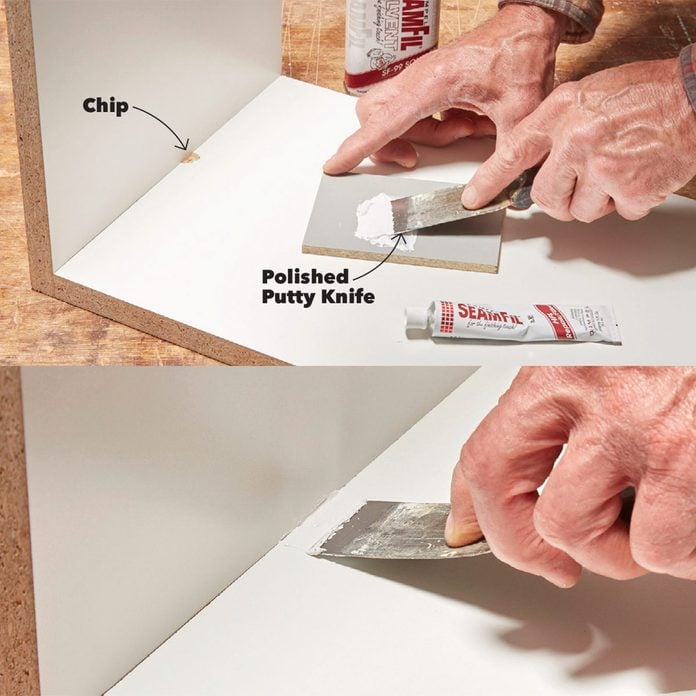
Repair Chips with a Special Filler
SeamFil plastic filler paste comes in a tube and is commonly used by pros who work with plastic laminate to repair chips. And since the surface of melamine panels and shelves is also a type of plastic laminate, the repairs blend in well. SeamFil paste is available for well-nigh $v per 1-oz. tube online or where plastic laminate (used for countertops) is sold. Information technology's available in 20 standard colors that tin exist mixed to create custom colors.
To utilize the SeamFil paste, first clean the area with the special SeamFil solvent (available for virtually $9 per half pint where the paste is sold). And so spread a small amount of the paste on a chip of wood or plastic laminate. Work the paste around with a polished putty knife until some of the solvent starts to evaporate and the paste starts to thicken. So press the thickened paste into the surface area to be repaired and smooth it with the putty pocketknife. It may take a few coats to go a affluent surface. Make clean off excess paste using a rag dampened with the solvent.
11 / 15
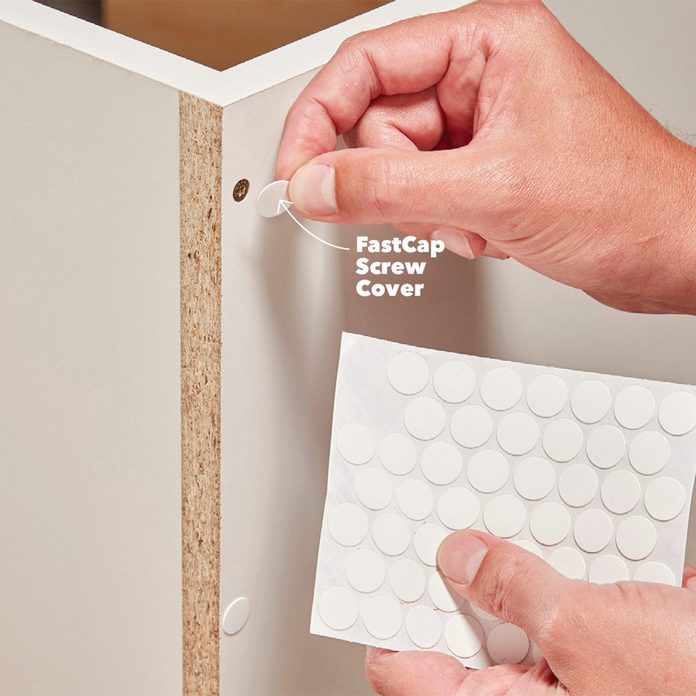
Hide Screw Heads
To muffle spiral heads, you have a couple of options. You can buy plastic caps that snap onto or over your screw heads. These work fine just leave a protruding cap.
The other option is to cover the screw with FastCap self-sticking plastic screw covers ($three to $5 for 56 1/2-in. covers). These are available at some retailers, online or directly from FastCap. Go to fastcap.com to see the huge multifariousness of sizes and colors. If you're really picky and want to install a well-nigh invisible, flush screw embrace, you lot can purchase a special FlushMount drill bit organization that makes a perfect-depth recess for the plastic spiral covers.
12 / fifteen
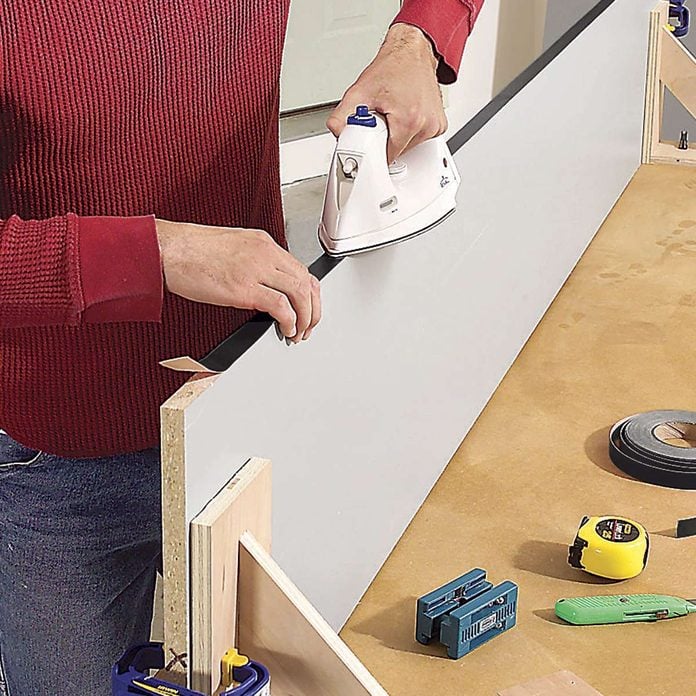
Terminate Raw Edges with Edge Banding
When the edge of a melamine panel is visible simply you don't want to add solid woods nosing, utilize edgebanding tape. You tin can buy iron-on edge banding at most home centers. But an fifty-fifty easier solution is to apply cocky-adhesive or pare-and-stick edge banding. FastCap is one visitor that supplies peel-and-stick border banding in a wide variety of colors, widths and lengths. Called Fastedge, it's available online and at woodworking stores.
Move a hot iron quickly over atomic number 26-on edge-banding record to melt the glue. If you lot're using self-agglutinative edge banding, you can skip this footstep and simply pare off the paper backing and stick the edge banding to the particleboard border.
13 / 15
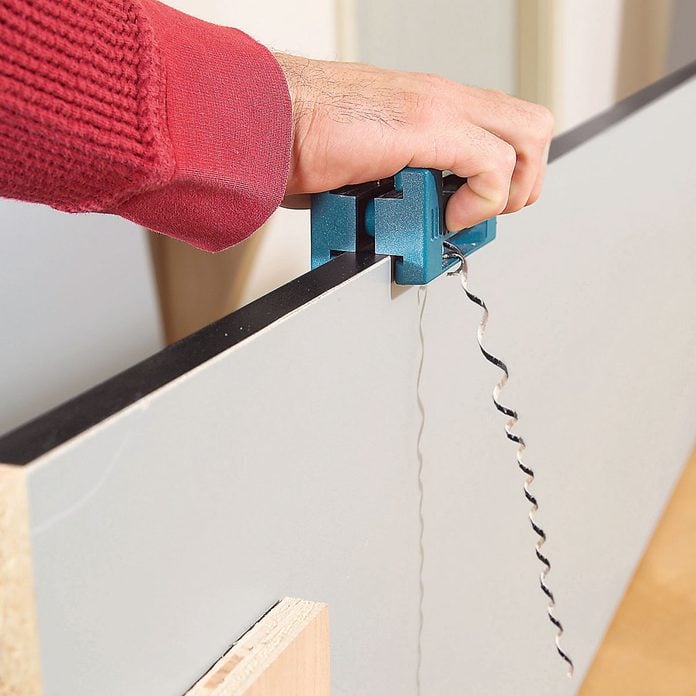
Trim the Tape to Finish the Edge
Trim the overhanging edges of the tape flush to the melamine surface with a special tool called an edge-banding trimmer. You'll find edge-banding trimmers at home centers, woodworking stores and online for almost $20.
fourteen / 15

Purchase Shelving with Edges Finished
You can skip edge banding birthday if you just demand shelves. Shelving with finished edges is readily available at home centers and hardware stores. The merely drawback is that the color option may be limited.
fifteen / fifteen

Melamine basics
Look around and you'll find melamine furniture, melamine shelves, melamine wall panels, and fifty-fifty melamine slatwall. Information technology's usually labeled every bit melamine, merely you may also encounter terms such as thermally fused laminate or simply prefinished panels or prefinished
shelves.
You can buy 4 ten 8-ft. sheets of melamine in 1/8-, i/4-, 1/2-, 5/8- and iii/4-in. thicknesses and melamine shelves in various lengths and widths. Home centers may only stock 1/4-in. and three/iv-in. thicknesses. Melamine sheets cost about 60¢ to $1.25 per square pes. Shelving costs well-nigh $1.forty to $ii per linear human foot depending on the width.
Learn how to build the Ultimate Garage Cabinets with melamine here.
Originally Published: November 28, 2017
Source: https://www.familyhandyman.com/list/how-to-use-melamine/
Posted by: taorminapricandere.blogspot.com
0 Response to "Can I Use Brad Nails On Cornhole Boards"
Post a Comment